New recipes and updates

Get new recipes
in your inbox

Cuisine Fiend https://www.cuisinefiend.com

Find a recipe by ingredient

Homemade butter

Thu, 3 October, 2019

⯆ JUMP TO RECIPE
How to make butter at home from fresh cream, using mixer? It’s much easier than you would think. Step by step, artisan butter churning instruction without special equipment.

homemade butter cuisinefiend.com

A butter recipe? What? You mean, getting a packet from the shops, opening it and spreading some on toast, that’s the recipe? Very funny.

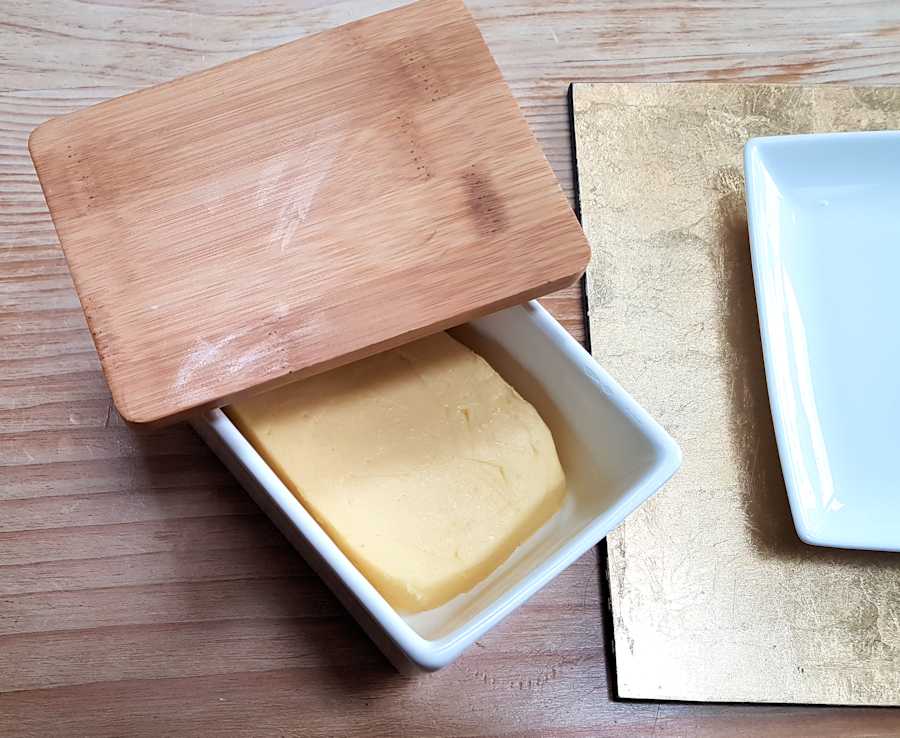
Except it isn’t. It’s homemade butter and it’s the best butter in the world – at least the best I have ever put on my bread. Salted? Unsalted? Smoked? Truffled? The world’s your pat of butter.

You knew, didn’t you? An urban myth says that you can just pour some cream into a jar, shake the jar for a few seconds and you’ll get butter. Whenever you whip cream, there’s always the worry of overwhipping and turning it into butter. That’s how it works but, fortunately for your Chantilly and unfortunately for the milkmaid, it doesn’t happen so fast and furiously.

butter made at home from cream cuisinefiend.com

It takes about 5 minutes even in a standing mixer to beat the cream into submission – meaning, Really Firm Peaks. Then it all starts to look really awful as the cream curdles. A while longer, and it resembles scrambled eggs gone horribly wrong and that is when you realise you should have put the lid over the mixer bowl.

Butter is made by separating fat globules from the liquid, buttermilk – which by the way you dare not throw away as it’s wonderful for pancakes or making bread. And surely you will need some to spread your butter on? And also, how embarrassing to have homemade butter and keep buying Hovis sliced!

Back to butter – separated fat still contains residues of buttermilk in it and that will affect the shelf life: if not rid of, it will make the butter go sour. So the final phase in our churning process is washing butter, bizarre as it may sound.

you can churn your own butter cuisinefiend.com

The method below describes the proper, involved process but as you get the taste for homemade butter (and you will), you’ll need a shortcut. Instead of washing the butter in a bowl of iced water, you can continue in your mixer with the paddle, adding some iced water to it, beating at low speed, draining and replacing with fresh water three or four times. True, it won’t be quite THAT artisan and handmade but your hands will be spared the frost bite. For adding salt, leave the butter in the bowl for a while to make it more pliable again, gently mopping up moisture in the bowl with paper towel, then whiz it once or twice with the salt using the mixer paddle.

Done. And a warning: once you’ve tried this, it will be extremely difficult to go back to Lurpak.


Homemade butter

Servings: makes 200g butterTime: 30 minutes
Tags: preserves

INGREDIENTS

  • 300g double cream, at room temperature (ideally left out of fridge for 24 hours)
  • ½ tsp (3g) fine or flaked sea salt
  • For flavoured butter, optional:
  • ½ tsp smoked salt (instead or ordinary)
  • finely chopped tarragon
  • green nori or dulse flakes
  • ½ tsp truffle paste


METHOD

1. You’ll need a handheld or standing mixer, a sieve lined with muslin cloth, iced water and two large clean wooden spoons (or butter bats) chilled in the freezer for half an hour.

2. Pour the cream into a clean bowl and beat with the mixer balloon or whisk attachment like you would in order to whip the cream. Continue at high speed until it whips, overwhips, turns distinctly yellow and curdles into fat blobs and liquid; turn the speed down before it splashes out everywhere. If possible, change the mixer attachment to paddle at this point as it is very tough to scrape butter out of the balloon whisk.

how to make butter: whipping cream cuisinefiend.com

3. Scoop it out onto the sieve lined with muslin set over a bowl, if you want to keep the drained buttermilk for baking. Drain well and squeeze the muslin cloth to get rid of as much liquid as you can.

how to make butter: draining buttermilk cuisinefiend.com

4. Return the butter to the mixer bowl and beat for a few seconds again to get rid of more buttermilk. If too much is left in the butter it will make it go sour quickly. Transfer the butter back to the muslin cloth and repeat the draining and squeezing.

how to make butter: beating butter cuisinefiend.com

5. Fill the mixing bowl with iced water and plunge the butter into it. Work it with the chilled wooden spoons, butter bats or your hands, kneading, pressing and squeezing to expel any remaining buttermilk. Change the iced water and repeat two or three times until the water is almost clear.

how to make butter: kneading butter cuisinefiend.com

6. If you want plain unsalted butter, shape it into a pat or stick, wrap in parchment and chill.

7. For salted or other flavoured butter, spread it thinly with the wooden spoons on a sheet of parchment. Sprinkle with the salt or other flavouring, then fold with the spoons to distribute the flavour evenly. Shape into a pat or stick and wrap in clean parchment.

how to make butter: shaping butter cuisinefiend.com

8. The butter will keep at least a week in the fridge if you worked hard at expelling the buttermilk. It also doesn’t get very hard so can be spread on bread straight from the fridge.


NEW recipe finder

Ingredients lying around and no idea what to cook with them? Then use my NEW Recipe Finder for inspiration!

Recipe Finder


Leave a reply

Your email address will not be published

Characters left 800
Comment*
Recipe rating
Name*
Email address*
Web site name
Be notified by email when a comment is posted

* required

Cuisine Fiend's

most recent

About me

Hello! I'm Anna Gaze, the Cuisine Fiend. Welcome to my recipe collection.

I have lots of recipes for you to choose from: healthy or indulgent, easy or more challenging, quick or involved - but always tasty.


Newsletter

Sign up to receive the weekly recipes updates


Follow Fiend