Make your own candied citrus peel for the festive baking! It’s easy and fun, and the house is filled with unbelievably wonderful aroma. Plus, you get an amazing by-product.
Candied peel? Just raisins please
Is it because my grandmother used to make her own peel to put into her Christmas fruitcakes? I doubt it – as a child I meticulously picked every single piece from the cake.
I’d get very frustrated with her Mohnstollen, a traditional poppy seed-filled stollen, because the peel in the filling was completely indiscernible amongst the poppies. Resignedly, I’d scrape out the entire filling and ate the bare dough. A silly brat: what would I give now for the details of Grandma’s candied peel recipe?
NB: some things are definitely hereditary. My grown-up daughter still asks every Christmas why I HAVE TO put, and I quote: ‘those little cubes of s***’ into the Stollen.
But no – it’s not just because of my ancestry I embarked on the homemade peel project. It’s mainly because it’s such a hit and miss when buying it from the shops.
Some are so artificially coloured and soaked in additives they make Alice’s complaint relevant. Others are just sugar, without much citrus flavour.
Some are tough enough to break your teeth and then there are those that blandly disappear in the cake. So making your own candied citrus peel is simply the best bet.
What oranges and lemons are suitable?
The key is the thickness of the citrus skins: thin rinds will still smell gorgeous and have great flavour but they might turn out very brittle.
The best ones are those we are normally not very happy with for the juicing purposes: thick skin, lots of pith and not much flesh. Like Navel oranges, and large, unwaxed lemons.
The most efficient way to approach the project, and let’s not forget this is also about battling food waste, is to peel the oranges and eat the flesh first.
With the lemons, you might try to cut the rind off them with a sharp knife, or juice them and reserve the juice in the fridge for kitchen uses.
And the more pith you manage to remove, the easier the job will be later on. But there’s absolutely nothing wrong with putting juiced orange or lemon halves, pith, membranes and all, into the pan to cook and worry about cleaning them later.
How to make candied peel
It is no big project but a pleasant way to spend a Sunday afternoon, for instance.
The first stage is boiling the skins. To stop them floating up to the top, place a smaller lid in the pan to keep them submerged. After half an hour of simmering, they should start to soften.
After you drain and cool them, the laborious task of removing any remaining pith beckons. The cleaner, more translucent the rinds, the nicer the candied peel will be so it’s worth meticulously scraping and scrubbing. A small knife or/and a spoon will be useful.
The second stage is cooking in syrup, equal weights of water and sugar. This will take half an hour again and afterwards the peel should stay in the syrup until cold.
Orange syrup
After you remove the peel, arrange it on a wire rack set over a tray and dry it in the lowest of the low ovens, 80C if possible. They will take between one and two hours and is done when the peel stops being terribly tacky but is still pliable.
The syrup it cooked in is the most amazing cooking by-product. Strain it carefully into a container and keep in the cupboard.
It’s fantastic in drinks, for drizzling, in dressings, added to cakes, poured over desserts and anything else that needs a wonderfully orange sweetness.
In the meantime the peel will have dried in the oven and now it only needs dredging through caster sugar, to stop it sticking into one big lump.
That’s also why it’s better to store it in chunks or strips rather than chopped finely. No preservatives or stuff to keep the ‘little cubes …’ perfectly separate you see!
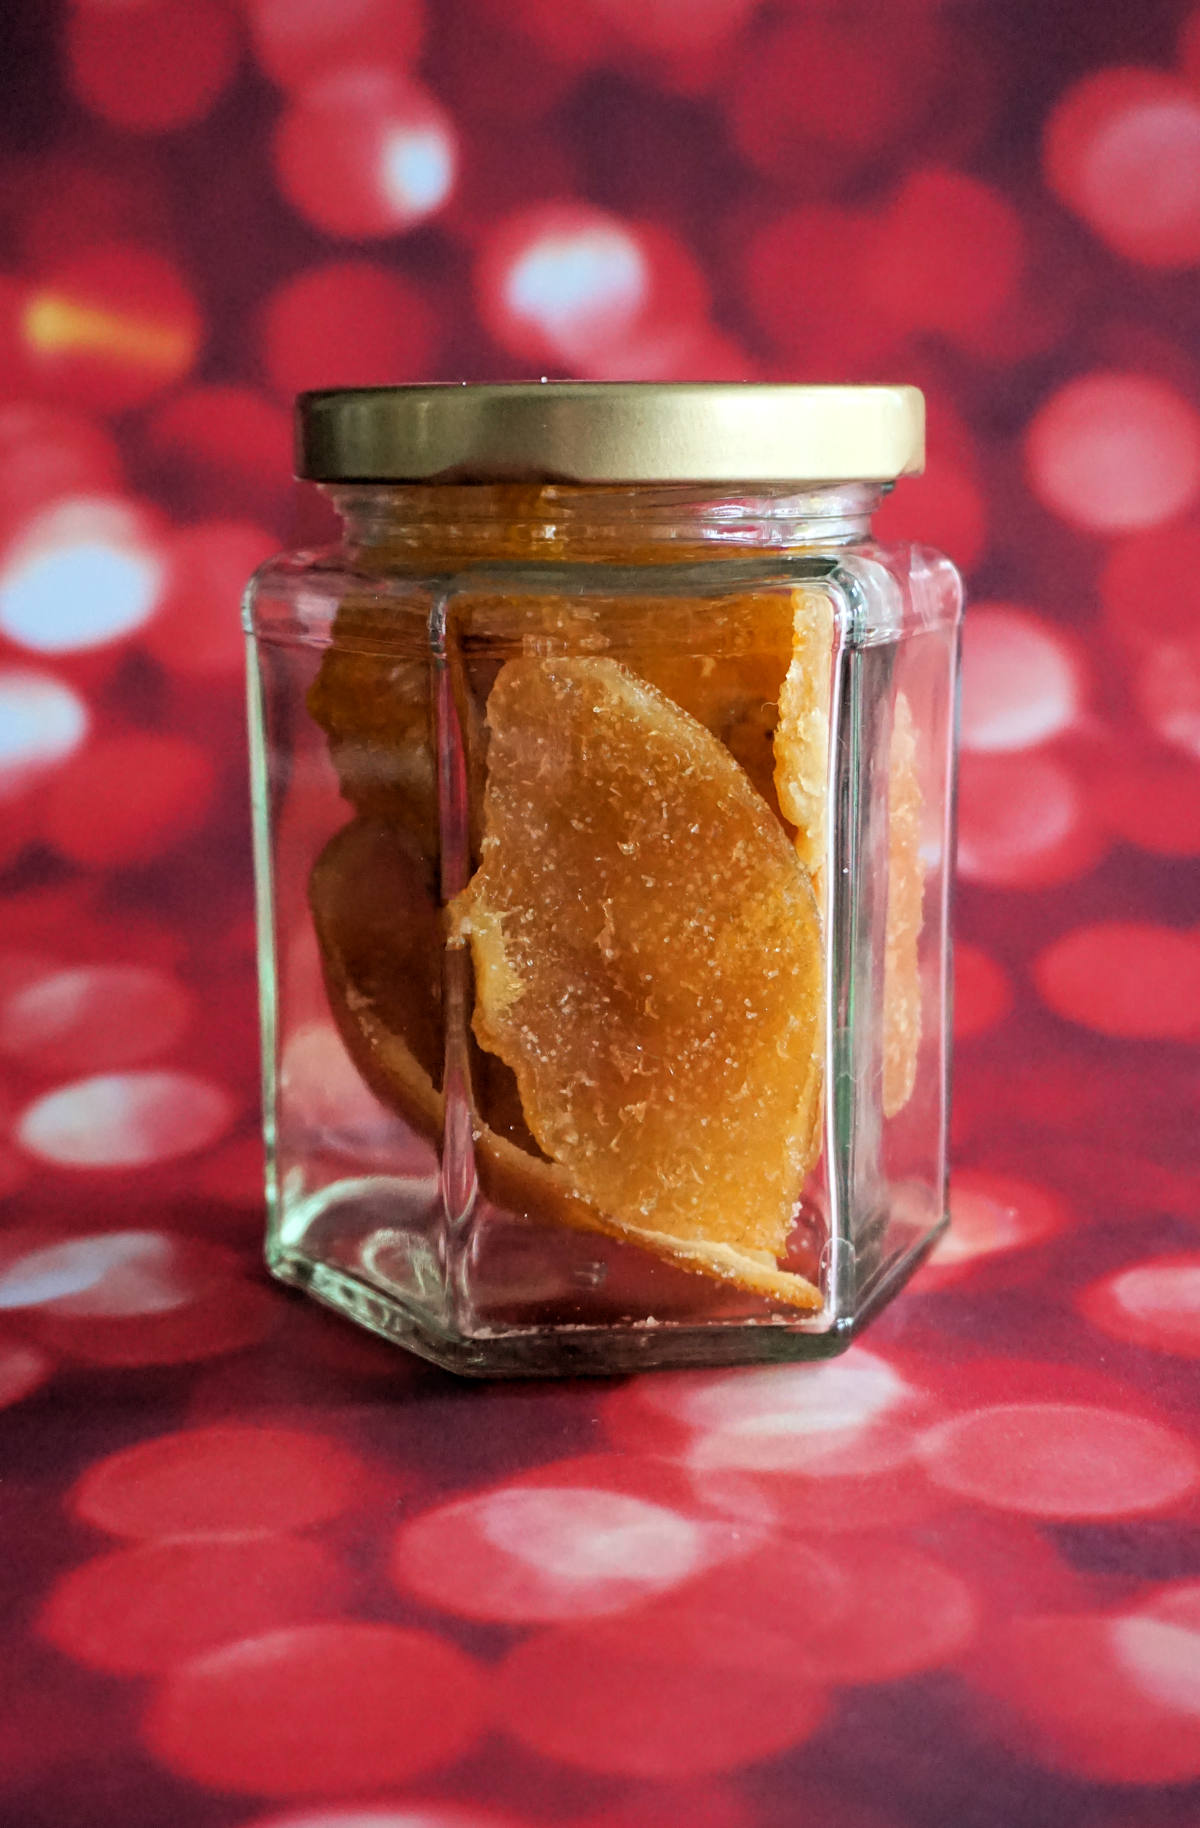
In an airtight jar, in the fridge, the peel will happily keep for a good few weeks and can be chopped as and when needed.
More orange recipes
Orange tartlets with almond cream or ricotta filling, topped with candied orange slices, that’s another preserved orange recipe.
Orange and walnut loaf cake with cinnamon and fresh ginger, a wonderful combination of flavours. It’s made in a saucepan. It’s tender and buttery like a pound cake.
Raw fennel and orange salad recipe with its own dressing of orange juice plus a little oil, and there’s an instruction how to fillet an orange in the recipe!
More sweet preserve recipes
Quick and simple glace cherries recipe: make your own candied fruit. They will last for a couple of weeks in a jar. Joking, of course – they’ll never last that long…
Microwaved pomegranate curd made from fresh fruit juice extracted from pomegranate seeds: arils. Both juicing the pomegranate and cooking the curd is easier than you think.
Slow roasted strawberries become jammy but not too sickly, coated in luscious syrup, and they have a multitude of uses in desserts, cakes and afternoon tea confections.